How to Prepare a Field for Planting Corn: A Step-by-Step Guide
- September 11, 2025
- By Arthur Gray
Getting ready to plant corn is a big job, and I’ve learned that how I prepare the field makes a huge difference in the end. It’s not just about getting seeds in the ground; it’s about setting up the best possible conditions for them to grow. Over the years, I’ve acquired a few insights into preparing a field for corn planting, and I’d like to share my process. It involves examining the soil closely, selecting the right seeds, and preparing the field perfectly before the first kernel is planted.
Key Takeaways
- Always start by checking your soil’s type and how much moisture it holds. This tells you a lot about what your corn will need.
- Picking the right corn variety for your area and the season is important for a good harvest.
- Primary tillage helps break up the soil, but be careful not to work it when it’s too wet or too dry.
- Adding amendments like fertilizer or compost can give your corn a good start, but make sure you know what your soil needs first.
- Getting the soil temperature right and planting at the correct time are key for seeds to sprout well.
Assess Soil Type and Moisture Levels
Before I even think about putting seeds in the ground, I always start by getting a good feel for the soil itself. Understanding what kind of soil I’m working with is important. Is it sandy, clay, or somewhere in between? This makes a big difference in how it holds water and nutrients. For instance, sandy soils drain fast, meaning I might need to irrigate more often, while clay soils hold onto water but can get waterlogged if I’m not careful.
Next up is checking the moisture. I usually dig a small hole, maybe six inches down, and grab a handful of soil. If it crumbles apart easily when I squeeze it, it’s usually about right. If it stays in a tight ball or feels dry and dusty, I know I’ve got some work to do with watering before planting. Too much water is just as bad as too little, though. Corn roots don’t like sitting in soggy soil; it cuts off air and can lead to all sorts of root problems. It’s a bit of a balancing act.
Here’s a quick way I gauge the moisture:
- Crumbles easily: Good to go, moisture is likely adequate.
- Forms a tight ball, doesn’t crumble: Soil is probably too wet. Wait for it to dry a bit.
- Feels dry, won’t hold shape: Soil is too dry. Irrigation is needed.
Getting this right from the start means the corn has a much better chance of establishing a strong root system, which is key for the whole growing season.
I also keep in mind that different soil types need different approaches to irrigation. For example, if I’m dealing with dry conditions, methods like drip irrigation can be effective at getting water right to the roots without wasting too much. Knowing your soil type helps you pick the best way to manage water, and you can find more information on soil moisture measurement to help with this.
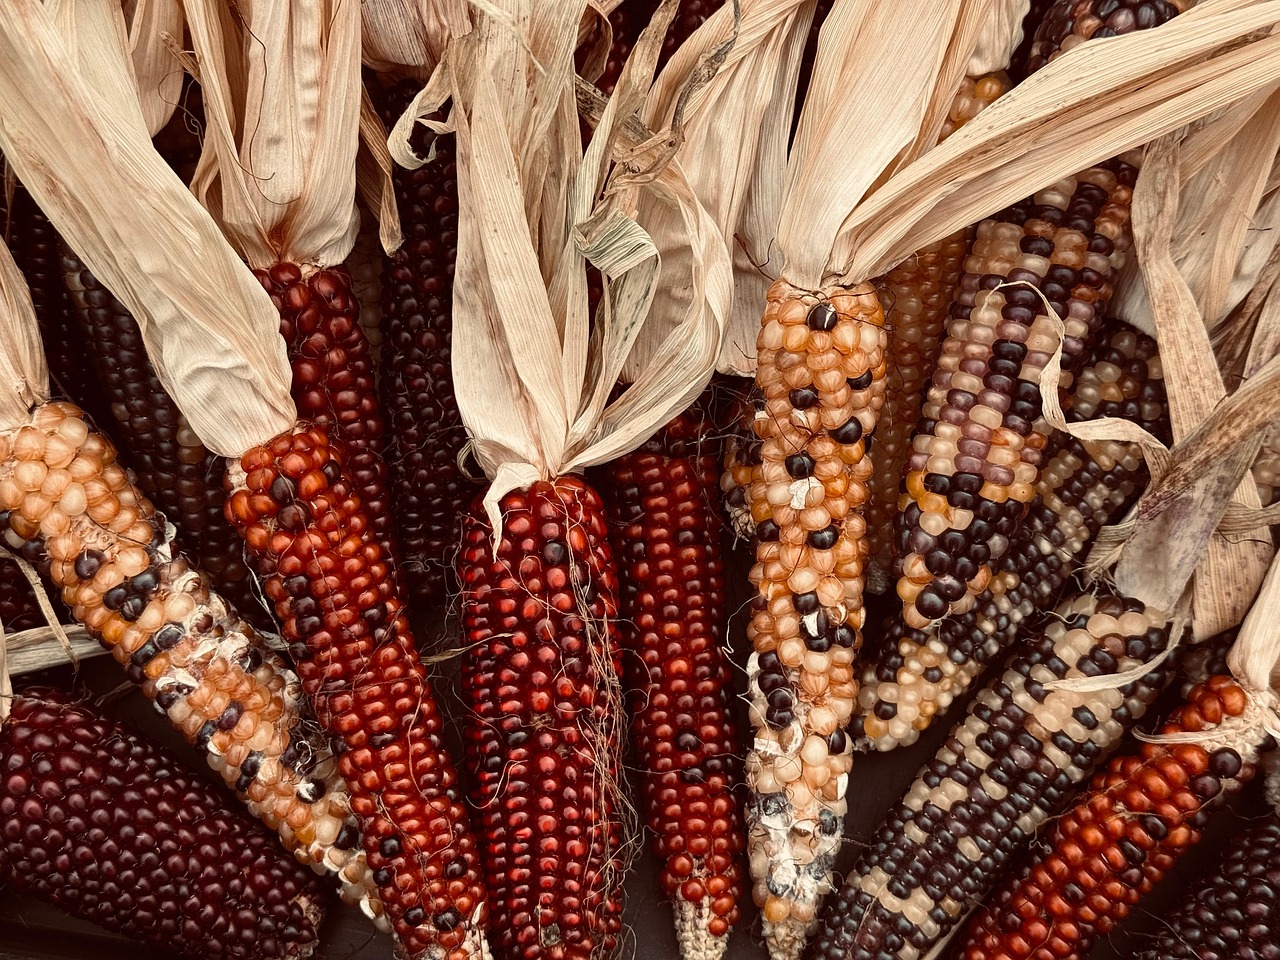
Select Suitable Corn Varieties
Choosing the right corn seed is a big deal for getting a good harvest. I always spend time looking at what’s available because each variety is different. Some are bred to grow fast, others are tougher against bugs or diseases, and some just handle dry spells better.
When I’m picking, I think about when I’ll be planting. If I’m getting in the ground early, I might go for a variety that matures fully, which usually means it’ll dry down quicker in the fall. If I’m running late, I’ll grab an earlier maturing type so it has a better chance of finishing before the first frost. It’s a balancing act.
I also look at the “trait packages.” These can give the seeds built-in protection against certain insects or herbicides, which can save me a lot of work later on. Or, I can go with a more basic seed and handle pest or weed control myself as needed. It depends on what I’m comfortable with and what challenges I expect in my field.
Picking the right seed isn’t just about the corn itself; it’s about matching the seed’s strengths to my specific field conditions and my own farming practices. It’s a decision that impacts the whole season.
Here’s a quick look at some general categories:
- Early Maturity: Good for shorter growing seasons or if you want to harvest sooner.
- Mid-Maturity: Offers a balance of yield and maturity time.
- Late Maturity: Typically provides higher yields but needs a longer, warmer season.
- Drought Tolerant: Bred to perform better with less water.
- Pest/Disease Resistant: Offers built-in defenses against common problems.
Talking to seed representatives is usually helpful. They know their products well and can give advice based on what works in our area. I’ve found that understanding how corn roots develop, especially the nodal roots, is also important for picking varieties that will establish well.
Perform Primary Tillage

After assessing the soil and selecting the right corn variety, the next step is to get the ground ready for planting. This is where primary tillage comes in. My goal here is to break up any compacted layers and start mixing in any leftover crop residue from the previous season. It helps to loosen things up.
I usually start with a moldboard plow or a chisel plow, depending on the field conditions and what I’m trying to achieve. A moldboard plow does a good job of inverting the soil, burying residue and weeds, which can be helpful if I had a lot of disease pressure last year. However, it can also turn the soil over a bit too much for my liking sometimes, and I worry about losing topsoil. A chisel plow, on the other hand, stirs the soil more but doesn’t invert it. This tends to leave more residue on the surface, which is good for preventing erosion and holding moisture. It’s a trade-off.
Here’s a general idea of what I aim for with primary tillage:
- Loosen the soil: Break up any hardpans or compacted layers to allow for better root growth and water infiltration.
- Incorporate residue: Mix in leftover plant material from the previous crop. This adds organic matter back into the soil.
- Control weeds: Burying or uprooting existing weeds helps reduce competition for the young corn plants.
The depth of tillage is important. I aim for about 6 to 8 inches deep. Too shallow, and I won’t break up the compaction effectively. Too deep, and I might bring up too much dry soil or disturb the soil structure more than necessary. It’s a balance that often depends on the specific field.
It’s important to get this right because it sets the stage for everything that follows. If the soil is too wet when I do this, I risk creating more problems with compaction, which is the opposite of what I want. So, I always check the soil moisture before I even start the tractor. Making sure the soil crumbles nicely when squeezed is a good indicator that it’s ready. If it forms a tight ball, it’s usually too wet. Getting the soil testing done beforehand helps inform these decisions, and I always make sure to get my soil tested regularly, at least every few years, to keep up with fertility needs. soil testing
After this initial pass, the field will look rough, but that’s okay. The next steps will refine the seedbed.
Apply Soil Amendments and Fertilizers
After getting the soil ready, it’s time to think about what we’re adding to it. This step is all about giving the corn the best possible start with the nutrients it needs. Based on what my soil test told me, I’ll be adding some amendments and fertilizers.
Getting the right balance of nutrients is key to healthy corn growth and a good yield.
I usually start by looking at the soil test results. They tell me what’s missing. Corn, nitrogen, phosphorus, and potassium are the big three. Sometimes, I’ll add organic matter if the soil test shows it’s low. Things like compost or well-rotted manure can improve the soil structure and nutrient availability over time. I’ve also heard good things about using biochar, which is supposed to help with moisture and nutrient retention. If I decide to use it, I’ll aim for about a 5-10% mix by volume, but I’ll check with a soil specialist if I’m unsure about the exact amount for my field. You can find resources to help assess your soil and get recommendations for amendments like Trifecta+.
Here’s a general idea of what I might add, depending on the soil test:
- Nitrogen (N): This is a big one for corn, especially as it grows. I’ll likely apply a portion now and maybe side-dress later if needed.
- Phosphorus (P): Good for root development early on.
- Potassium (K): Helps with overall plant health and disease resistance.
- Organic Matter: Compost or aged manure to improve soil structure and feed microbes.
It’s important not to overdo it with fertilizers. Too much can actually harm the plants or lead to nutrient runoff, which isn’t good for the environment. I always try to follow the recommendations from the soil test and apply them evenly across the field.
I’ll be using my spreader for the granular stuff, making sure it’s calibrated so I’m not putting down too much or too little in any one spot. If I’m using a liquid fertilizer, I might apply it through the planter at a low rate as a starter, which can give the seedlings a boost right from the start.
Implement Secondary Tillage and Seedbed Preparation
After the initial heavy work of primary tillage, it’s time to refine the field. This stage is all about creating that perfect, fluffy seedbed where corn seeds can easily settle in and start growing. I usually go over the field with a disc or a field cultivator. The goal here is to break up any remaining large clods, level out the surface, and mix in any amendments we applied earlier.
Getting the soil texture just right is key to good germination and early root development. Too cloddy, and the seeds might not make good contact with the soil. Too fine and compacted, and the roots will struggle to push through. It’s a bit of a balancing act.
Here’s a quick rundown of what I aim for:
- Clod size: Aim for most soil particles to be smaller than a quarter.
- Surface evenness: The field should be relatively flat to ensure consistent planting depth.
- Moisture: The soil should be moist but not wet. If it’s too wet, you risk compacting it further, which is the opposite of what we want.
I often use a field cultivator for this step. It has S-tines that lift and loosen the soil, followed by a finishing tool like a spike-tooth harrow or a rolling basket to smooth everything out. This process helps to conserve moisture by creating a fine layer on top that acts like a mulch. It’s important to get this right because it sets the stage for the planter to do its job effectively. If the seedbed isn’t prepared properly, it can lead to uneven emergence, which means some plants will be bigger and stronger than others, making management harder later on. I always check the soil conditions after secondary tillage to make sure I’ve achieved the desired texture before moving on to planting.
Working the soil when it’s too wet is a common mistake. It can lead to compaction that lasts all season, hindering root growth and water infiltration. It’s better to wait a day or two for the soil to dry out a bit than to risk damaging the soil structure.
Determine Planting Time and Soil Temperature
Figuring out the right moment to get corn in the ground is important. It’s not just about beating your neighbor to the field, though I know the temptation is there. My own experience has taught me that patience does pay off here.
The most reliable indicator for planting corn is soil temperature. I always check to make sure the soil is at least 50°F, and ideally, there’s a warming trend expected for the next week or two. Planting into cold, wet soil is a recipe for disaster; it can slow down germination or even cause the seed to rot. You want that seed to have a good start, and that means warm soil.
Here’s a quick rundown of what I look for:
- Soil Temperature: Aim for a consistent 50°F or higher at planting depth (about 5-8 cm).
- Moisture Levels: The soil should be moist enough for germination but not waterlogged. A simple squeeze test can tell you a lot – if it crumbles, it’s usually good.
- Weather Forecast: Look for a stable warming trend. Avoid planting if a cold snap is predicted.
Some folks still rely on old sayings, like planting when the oak leaves are the size of a squirrel’s ear, but I find checking the actual soil temperature much more practical. You can find resources that detail optimal soil temperatures for various crops, which is helpful for making an informed decision about when to plant your corn for specific temperature ranges.
It’s also worth noting that planting too late can impact yields. While there’s a bit of wiggle room, I try to have my planting finished by mid-May to avoid significant yield losses. If you’re dealing with crop insurance, be sure to check your state’s specific planting dates to stay compliant.
Calibrate Planting Equipment and Set Row Spacing
Once the field is ready and the weather looks promising, it’s time to get the planter dialed in. This step is about making sure every seed has the best chance to grow. I always start by checking the planter’s calibration. This means making sure the seed meters are set correctly for the specific corn hybrid I’m planting and the desired plant population. A common target for many areas is around 33,000 to 38,000 seeds per acre, but this can shift based on your soil’s fertility and the expected weather for the season. If I’m expecting a drier year, I might plant a bit lighter to reduce competition for moisture. Conversely, a wetter year might allow for a slightly higher rate.
Next, I focus on row spacing. While 30-inch rows are traditional, many growers are finding benefits with narrower rows, like 20 inches, especially with newer hybrids. The choice can depend on the genetics of the seed and what works best for my specific field conditions. It’s a good idea to talk to your seed supplier; they often have good insights into how different hybrids respond to various row spacings and seeding rates.
Here’s a quick rundown of what I check:
- Seed Meter Calibration: Ensure the plates or discs match the seed size and shape, and that the drive mechanism is functioning correctly.
- Depth Control: Adjust the planter’s depth wheels and down pressure. I aim for about 2 inches deep. This depth helps ensure the seed is in moisture, whether the soil is a bit damp or on the drier side. Too shallow, and it might not get enough water; too deep, and it can struggle to emerge.
- Furrow Closing: Watch to make sure the furrow is closing properly behind the planter. I want to avoid sidewall compaction, which can hurt root development. Sometimes, I’ll even get out of the tractor every few hours to walk the rows and see how things are looking.
It’s easy to get caught up in just getting the seed in the ground, but taking the time to calibrate the planter properly is a small investment that pays off. If the planter isn’t set right, you could be leaving yield on the table from the very start. I learned this the hard way a few years back when I rushed the setup and ended up with an uneven stand.
Remember, the settings that work perfectly in the morning might need a tweak by the afternoon if the soil conditions change due to temperature or wind. Staying observant is key.
Monitor Field Conditions Post-Planting
After I’ve finished planting, my work isn’t done. I need to keep an eye on things to make sure the corn is coming up right. It’s easy to get caught up in the planting itself, but what happens next is just as important.
First off, I’ll be checking the stand. This means walking the rows, usually a few days after planting, to see how many plants have emerged and how evenly they’re spaced. I’m looking for skips, doubles, or any signs of poor germination. Getting a good, uniform stand is the first big step toward a successful harvest. If I notice a lot of issues, I might need to figure out why – maybe the planter wasn’t set quite right, or perhaps there was a problem with the seed itself. Understanding what went wrong helps me fix it for next year, or even make adjustments if it’s a widespread problem.
I also need to keep tabs on the soil moisture and temperature, even after planting. Conditions can change quickly, and if it gets too dry or too wet, it can still affect the young seedlings. It’s a balancing act. I’ve learned that checking the soil moisture by digging a small hole and squeezing the soil is a good way to gauge it. If it crumbles easily, it’s usually okay.
Here’s a quick rundown of what I’m looking for:
- Emergence uniformity: Are the plants coming up at the same time?
- Plant population: Am I close to my target number of plants per acre?
- Seedling vigor: Do the young plants look healthy and strong?
- Weed pressure: Are weeds starting to compete with the corn seedlings?
It’s tempting to just assume everything is fine once the seed is in the ground, but a little bit of observation goes a long way. I’ve found that paying attention to these early signs helps me catch potential problems before they become major issues. It’s all about giving the crop the best possible start.
I also make sure to check how the planter performed. Were the rows closing properly? Was there any sidewall compaction? Sometimes, I’ll get out of the tractor every few hours during planting to just look at the furrow. If the soil conditions change during the day, like getting drier or warmer, the planter settings might need a tweak. It’s good to know that attachments like row cleaners can help move residue out of the way, making sure the seed is in good contact with the soil. If I’m unsure about soil fertility, I’ll consider whether a starter fertilizer is needed, based on my soil tests. For more information on planting equipment, I found some helpful details on choosing the right planter size for my operation.
After planting, it’s important to keep an eye on how your trees are doing. Check the soil for dryness and look for any signs of stress or pests. Regular checks help ensure your new trees get the best start. For expert advice on tree care, visit our website today!
Frequently Asked Questions
Why is preparing the field so important before planting corn?
Getting the field ready is a big deal for corn. It helps the seeds sprout well, grow strong roots, and take in the food they need. Good preparation also helps stop weeds from growing, lets water soak into the soil better, and makes the soil healthier overall. It’s like making sure a house has a good foundation before building it.
How do I know if my soil is ready for planting?
First, I check the type of soil and how much water it holds. I also look at the soil’s temperature. Corn likes warm soil, so I wait until it’s at least 50°F (10°C) and is expected to stay warm. If the soil feels too dry when I squeeze a handful, I might need to water it a bit before planting.
What’s the best way to prepare the soil surface?
I aim to create a fine, crumbly surface. This usually involves loosening the top few inches of soil to remove rocks and weeds. I avoid working the soil when it’s too wet, as this can pack it down, or too dry, which can create hard clumps. The goal is to make it easy for the corn roots to grow.
How do I choose the right corn seed?
I look for corn varieties that are suited for my area and the expected weather. Some seeds grow faster, while others are better at fighting off bugs or diseases. I also consider whether I want seeds that have a special coating for extra protection when they first sprout.
What’s a good planting depth and spacing for corn seeds?
I typically plant corn seeds about 2 inches deep. This helps them reach moisture, especially if the soil is a bit dry. For spacing, I usually plant them so there are about 33,000 to 38,000 plants per acre, with rows about 30 inches apart. This helps the plants have enough room to grow without competing too much.
What should I do after I’ve planted the corn?
After planting, I like to check on the field to see how the corn is coming up. I count the plants to make sure the spacing is right and that there aren’t too many gaps or doubles. This helps me understand if my planting went well and what I might need to do differently next year.